
Sauerteig Starter selber machen
Letzten Monat haben wir euch gezeigt, wie ihr ganz einfach Sauerteigbrot selbst macht. Aber ihr habt keinen Starter? Kein Problem, hier zeigen wir euch, wie ihr euch euren eigenen Sauerteig-Starter macht!
Georg ist unser Brot-Bäcker! Vor zwei Wochen hat er euch verraten, wie er unser leckeres Sauerteigbrot herstellt. Das einzige Problem beim Sauerteigbrot: Wo bekommt man den Starter her?
Unseren ersten Starter habe ich damals selbst gemacht, denn das ist ganz einfach. Zufälligerweise sind wir danach auf einen Roggensauerteig-Starter auf einem Markt gestoßen, den wir dann mitgenommen haben. Denn bei Sauerteig gilt eine Regel: Je älter, desto besser!
Wenn du also keine Möglichkeit hast, anders an einen Sauerteigstarter zu kommen, kannst du ihn einfach selbst machen.
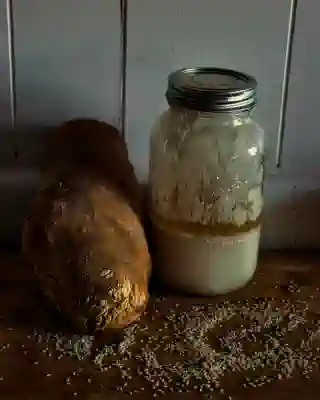
Sauerteig-Starter selber machen
Erster Tag
-
Stelle sicher, dass das Glas gründlich ausgewaschen und sauber ist. Da der Sauerteig während des Gärprozesses Gas produziert, sollte das Gefäß nicht komplett luftdicht verschlossen sein. Verwende entweder ein Einmachglas mit Deckel, aber ohne Gummi, oder ein normales, ausreichend großes Schraubglas (z.B. ein Gurkenglas) und mache in den Deckel ein kleines Loch.
-
Gebe 50g Vollkornmehl und 50 ml handwarmes Wasser (~38°C) in das Glas. Rühre alles mit einem Löffel um, bis ein klumpenfreier Brei entsteht. Verschließe dann das Glas und lasse es an einem warmen Ort (25°C – 30°C) für 24 Stunden stehen.
Zweiter Tag
- Öffne das Glas und füge erneut 50g Vollkornmehl und 50 ml handwarmes Wasser (~38°C) hinzu. Rühre alles erneut mit einem Löffel um, bis ein klumpenfreier Brei entsteht. Verschließe das Glas wieder und lasse es erneut an einem warmen Ort (25°C – 30°C) für weitere 24 Stunden stehen.
Dritter Tag
-
Öffne das Glas und überprüfe den Inhalt auf Schimmel. Normalerweise sollte sich keiner gebildet haben, aber es ist möglich. Entdeckst du Schimmel, musst du den Inhalt entsorgen und von vorne beginnen.
-
Falls kein Schimmel vorhanden ist, wiederhole die Schritte des zweiten Tages. Füge 50g Vollkornmehl und 50 ml handwarmes Wasser (~38°C) hinzu, rühre alles um, verschließe das Glas erneut und lasse es an seinem warmen Ort (25°C – 30°C) für weitere 24 Stunden stehen.
-
Mache dir keine Sorgen, wenn dein Sauerteigansatz bereits einen leicht säuerlichen oder essigartigen Geruch entwickelt hat. Es könnte auch sein, dass er etwas faulig riecht. Solange sich kein Schimmel bildet, ist dies akzeptabel. Wenn jedoch Schimmel auftritt, musst du von vorne beginnen.
Vierter Tag
-
Idealerweise sollte der Sauerteig heute deutlich aufgegangen sein und einen sauren Geruch haben.
-
Falls das nicht der Fall ist, wiederhole die Schritte vom dritten Tag.
-
Wenn der Sauerteig aufgegangen ist und nicht mehr faulig riecht, herzlichen Glückwunsch! Du hast deinen eigenen Sauerteig erfolgreich gezogen, der nun als Sauerteigansatz bezeichnet wird.
Tipps
Dein Sauerteigstarter wird anfangs nicht so gärfreudig sein, ABER: Das wird mit der Zeit besser. Je älter er wird, desto besser gärt er. Also wirf nicht gleich das Handtuch! Zur Unterstützung kannst du in den Brotteig (ACHTUNG!!! NICHT IN DEN STARTER) etwas Hefe geben. 2g reichen aus, um den Brotteig trotzdem schön fluffig zu machen
Je nachdem, welches Mehl du verwendest, erhältst du einen Weizen-, Roggen- oder Dinkel-Sauerteig. Wir halten unseren Starter immer “rein” und verwenden nur das Mehl, welches wir zu Beginn verwendet haben.